DHV Series - How-To Guide
Four columns decide whether the head unit can hear the car - and one update keeps the translation current.
A DHV unit with the wrong CAN box type, brand, model or year starts up and plays music but stays blind to the car. The four columns sit behind the Factory password, and the protocol data can be refreshed from the system update screen.
0:46 - the Factory password, the four CAN box columns, then the protocol data update on the same bench unit. Open the clip on YouTube if the embed is blocked.
Note: As our products are continuously upgraded, the interface on your unit may look slightly different. Please select the corresponding function according to your own model.
Quick answer
Open Settings, tap Factory in the left column, enter the factory code and tap Confirm. Tap Original Car Agreement to open the four columns - CAN Box type, Car Brand, Car Model and CAN Box - and set each one to the box fitted on the harness and the car it is installed in. Then open the system update screen and install Protocol data.
A DHV head unit is not wired to every switch in the car. Most of what it knows about the vehicle arrives as short messages on a two-wire bus, and those messages are written in the manufacturer's own dialect. The small box on the harness - the CAN box - sits between that bus and the radio, translates the dialect and hands the unit a set of plain signals it can use.
The functions that depend on it are the ones that come from the car rather than from the radio: the ignition and illumination states, the steering wheel keys, the reverse trigger, the parking radar beeps, and on cars that broadcast it, the climate text on the screen. A unit with the box set to the wrong car can look perfectly healthy - home screen, music, Bluetooth - while all of those stay dead, because nothing on the bus is being translated.
That is why the four columns exist. They are not a preference; they tell the firmware which dialect to expect, which model within that brand, and which year range of that model. The same physical box covers a long list of cars, so the box type alone is not enough, and the car model alone is not enough either.
Two settings, one idea. The columns select the dialect. The protocol data is the dictionary itself - a package of message definitions that is updated as cars change and as new models are added. Selecting the right car with an old dictionary still leaves gaps, and a current dictionary against the wrong car is worse than useless.
The CAN box rows are not on the Device page with the sound and display settings. They live behind the Factory password, which is why owners who scroll through Settings from top to bottom never find them.
From the launcher, tap Settings. The page is split: a column on the left reads Wlan, Device, General, Factory, User and System, and the right side shows the entries of whichever one is highlighted. It usually opens on Device, so the right side will show Display, Sound, GPS, Storage and Apps - none of which is what we need.
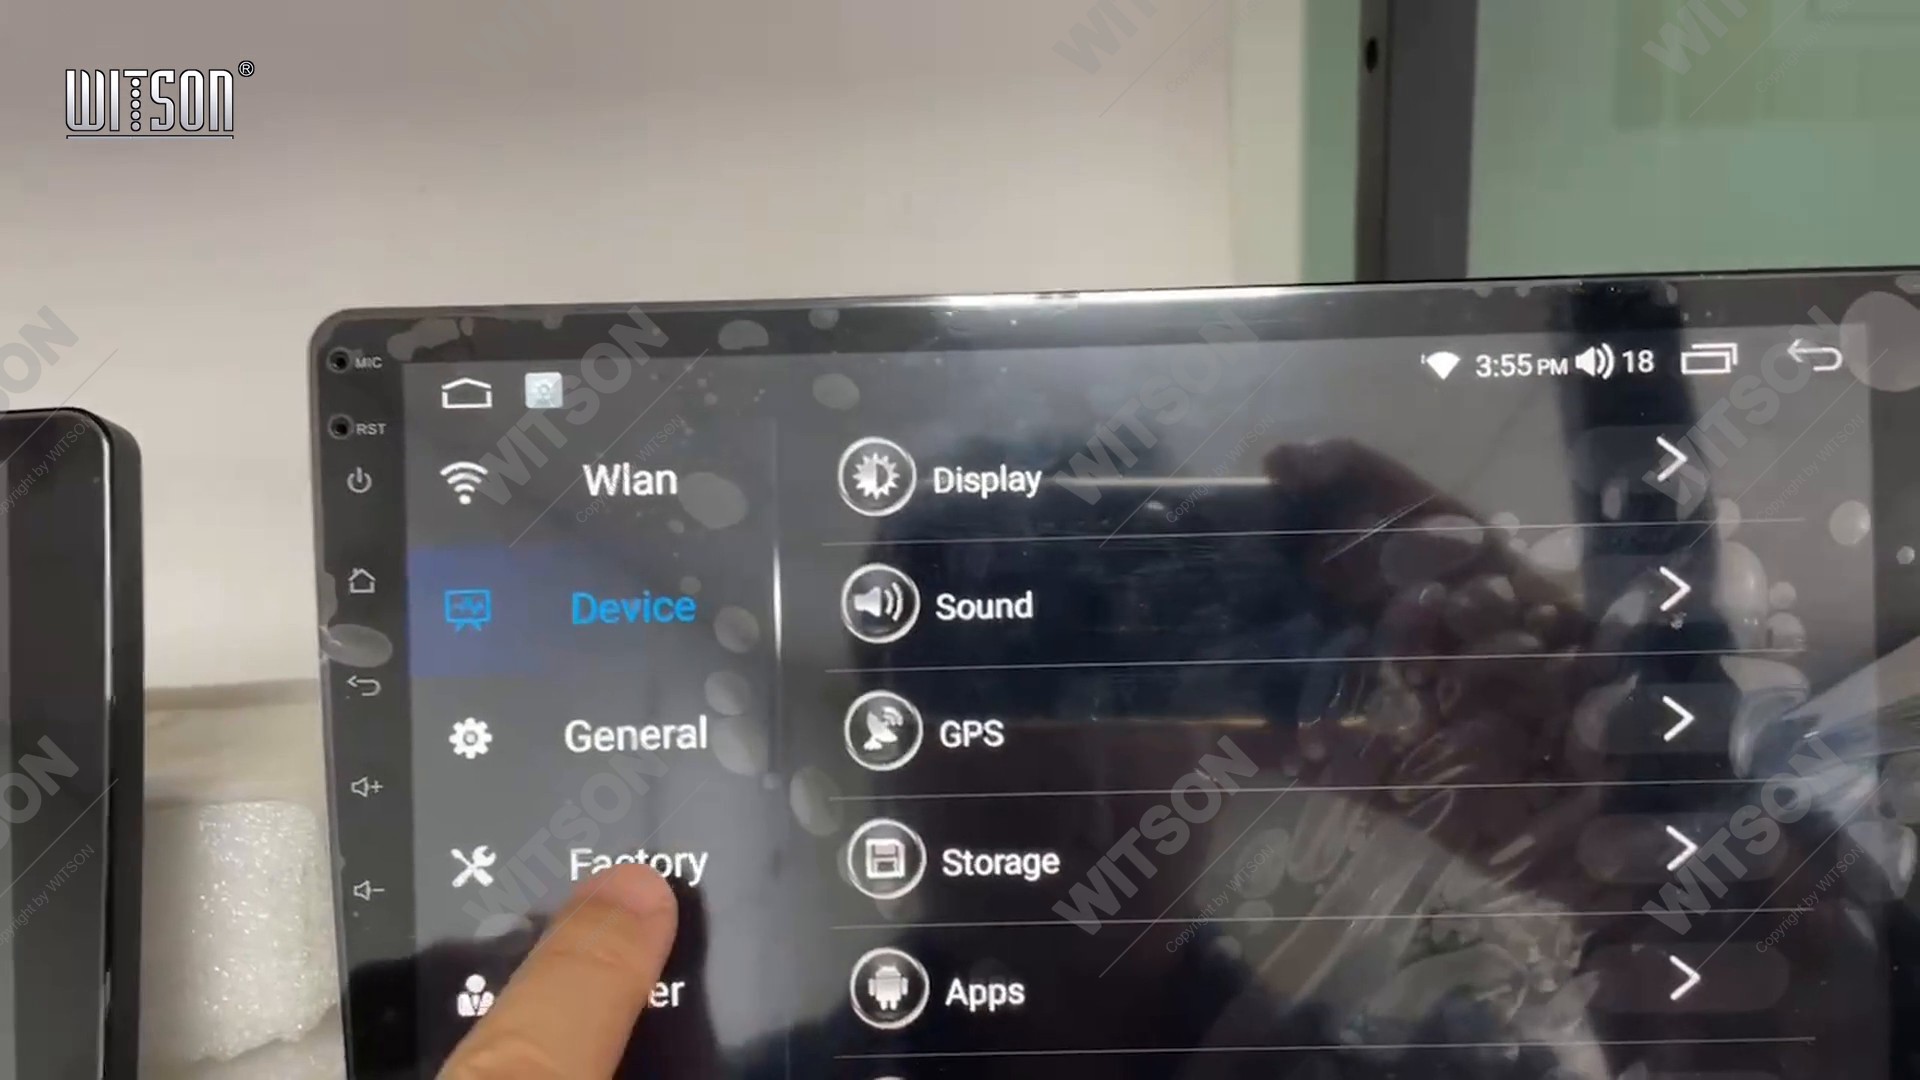
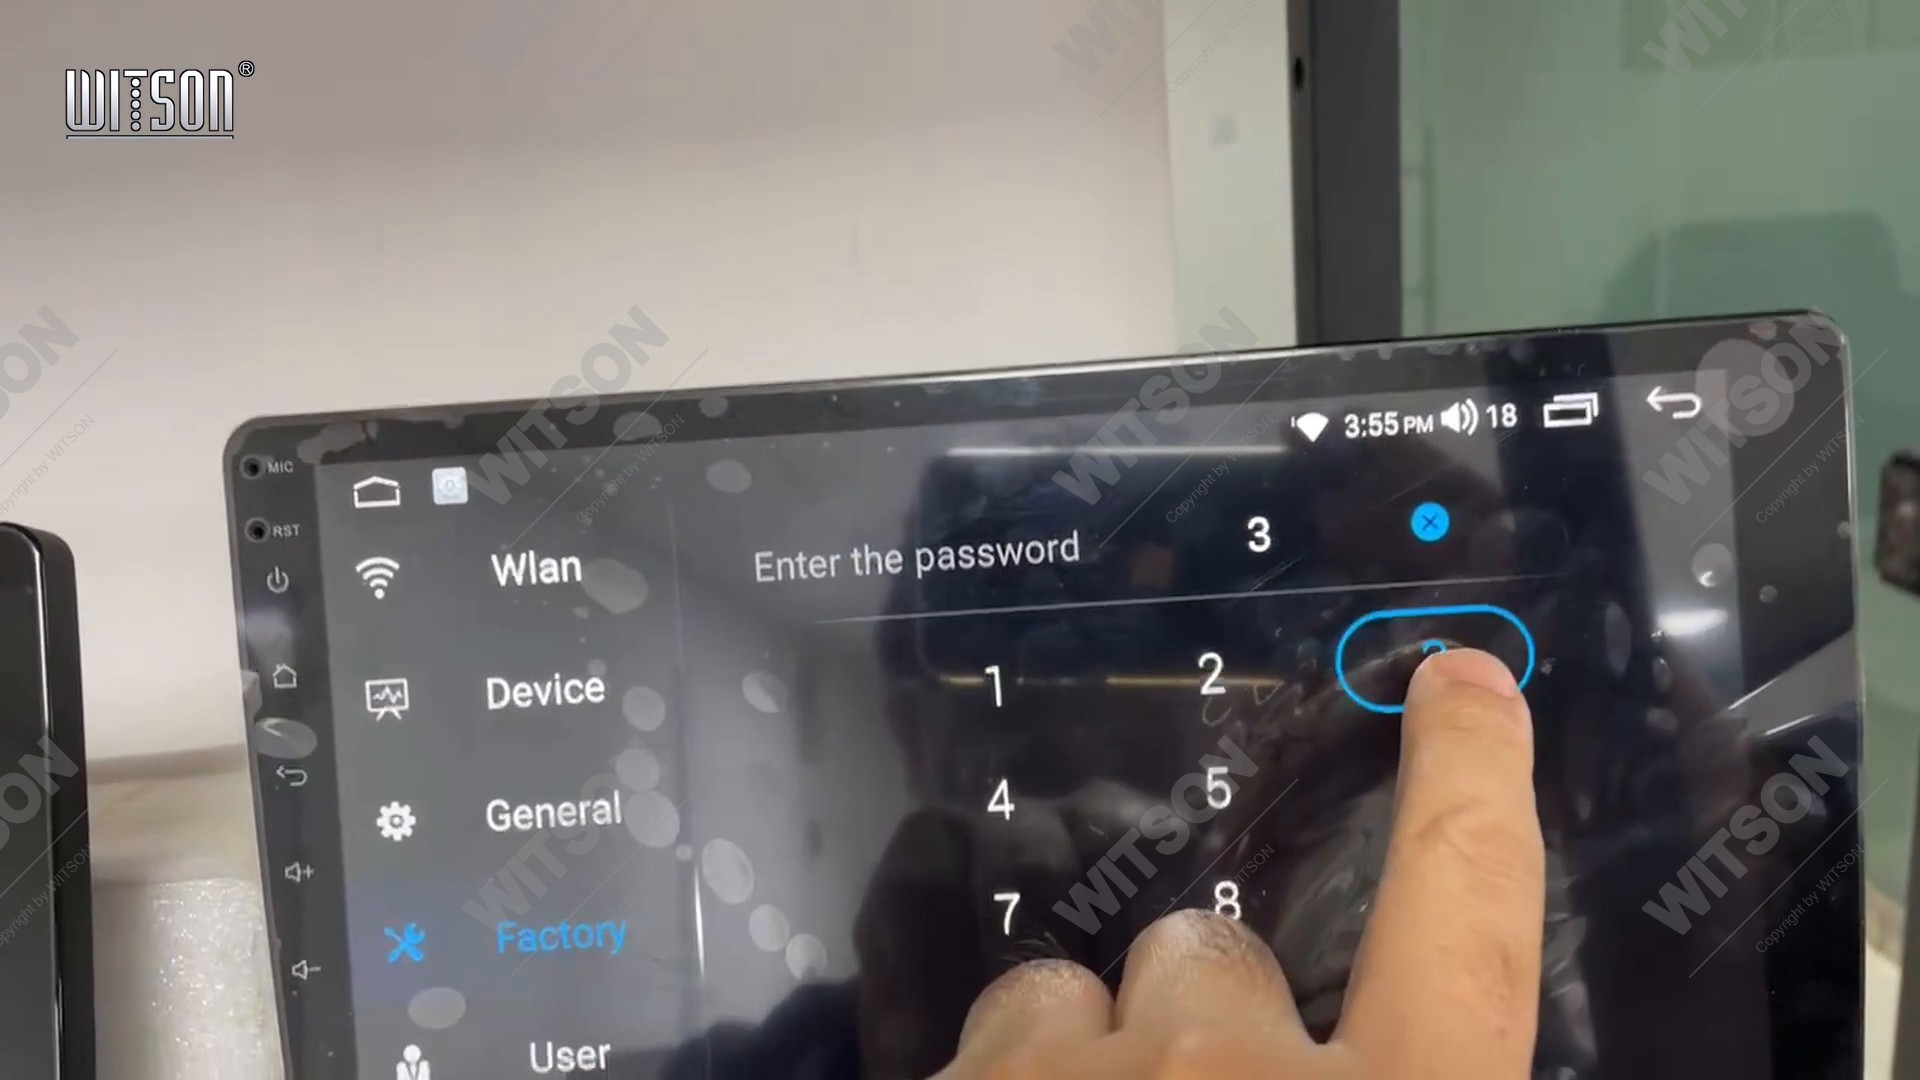
Tap Factory. A keypad covers the screen with Enter the password across the top, a blue X to clear the field, digits 1 to 9 and 0, and Confirm at the bottom. Type the code and tap Confirm. The digits stay visible as you type, so check the field before confirming; if a previous installer changed the code, ask the company that supplied the unit rather than working through combinations.
The Factory list opens on Touch Check, then Original Car Agreement, Car Model, Back MIC switch, Antenna normally on and the Reversing video format rows further down. Car Model is worth reading before you change anything: it shows the protocol the unit believes it is talking to. On the bench unit in the clip it reads Jeep Renegade, which is exactly the pairing selected a moment later.
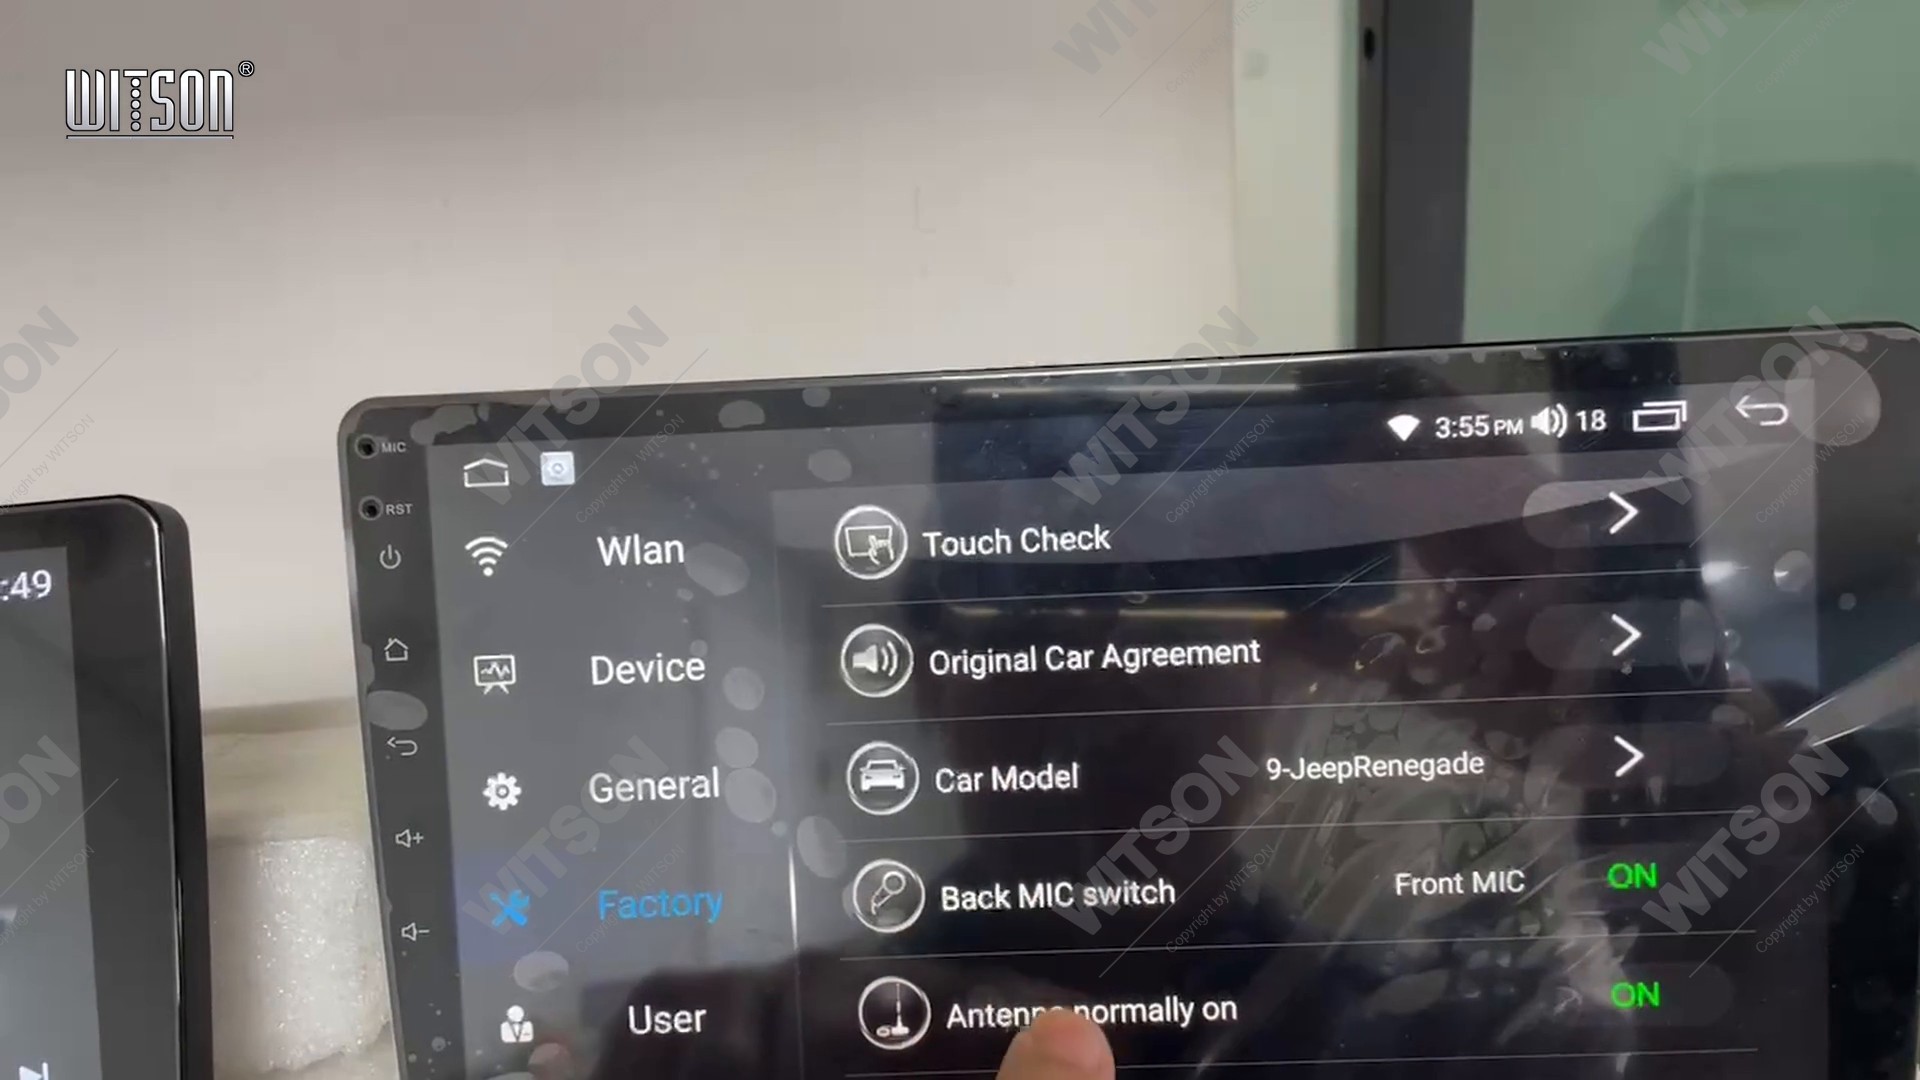
If Car Model shows a protocol name that does not match the car in front of you, the four columns have either never been set or were set for the previous vehicle. Both are normal on a unit that has been moved between cars.
Tapping Original Car Agreement opens the selection screen. It is a single table split into four columns, and each column is a list you scroll on its own. A yellow star marks the active entry in each column, so you can read the current selection at a glance without opening anything.
The first column is CAN Box type and it lists vendor codes rather than car names - on our unit RZC, XP, OD, LSDT, BNR and DaoJun. This one is not a guess: it is printed on the box that came with the harness. Match the letters exactly, because a box of one family will not answer a request written for another, and the symptom is silence rather than an error message.
The second column is Car Brand (Jeep, Chrysler, BYD, ROEWE, CHERY, Trumpchi and more), the third is Car Model (Cherokee, Renegade, wrangler, Challenger, Commander, Patriot under Jeep), and the fourth is CAN Box, which is the year range - 2016-2019 on the unit in the clip. Pick the brand first: the model column only lists the cars of the brand selected above it.
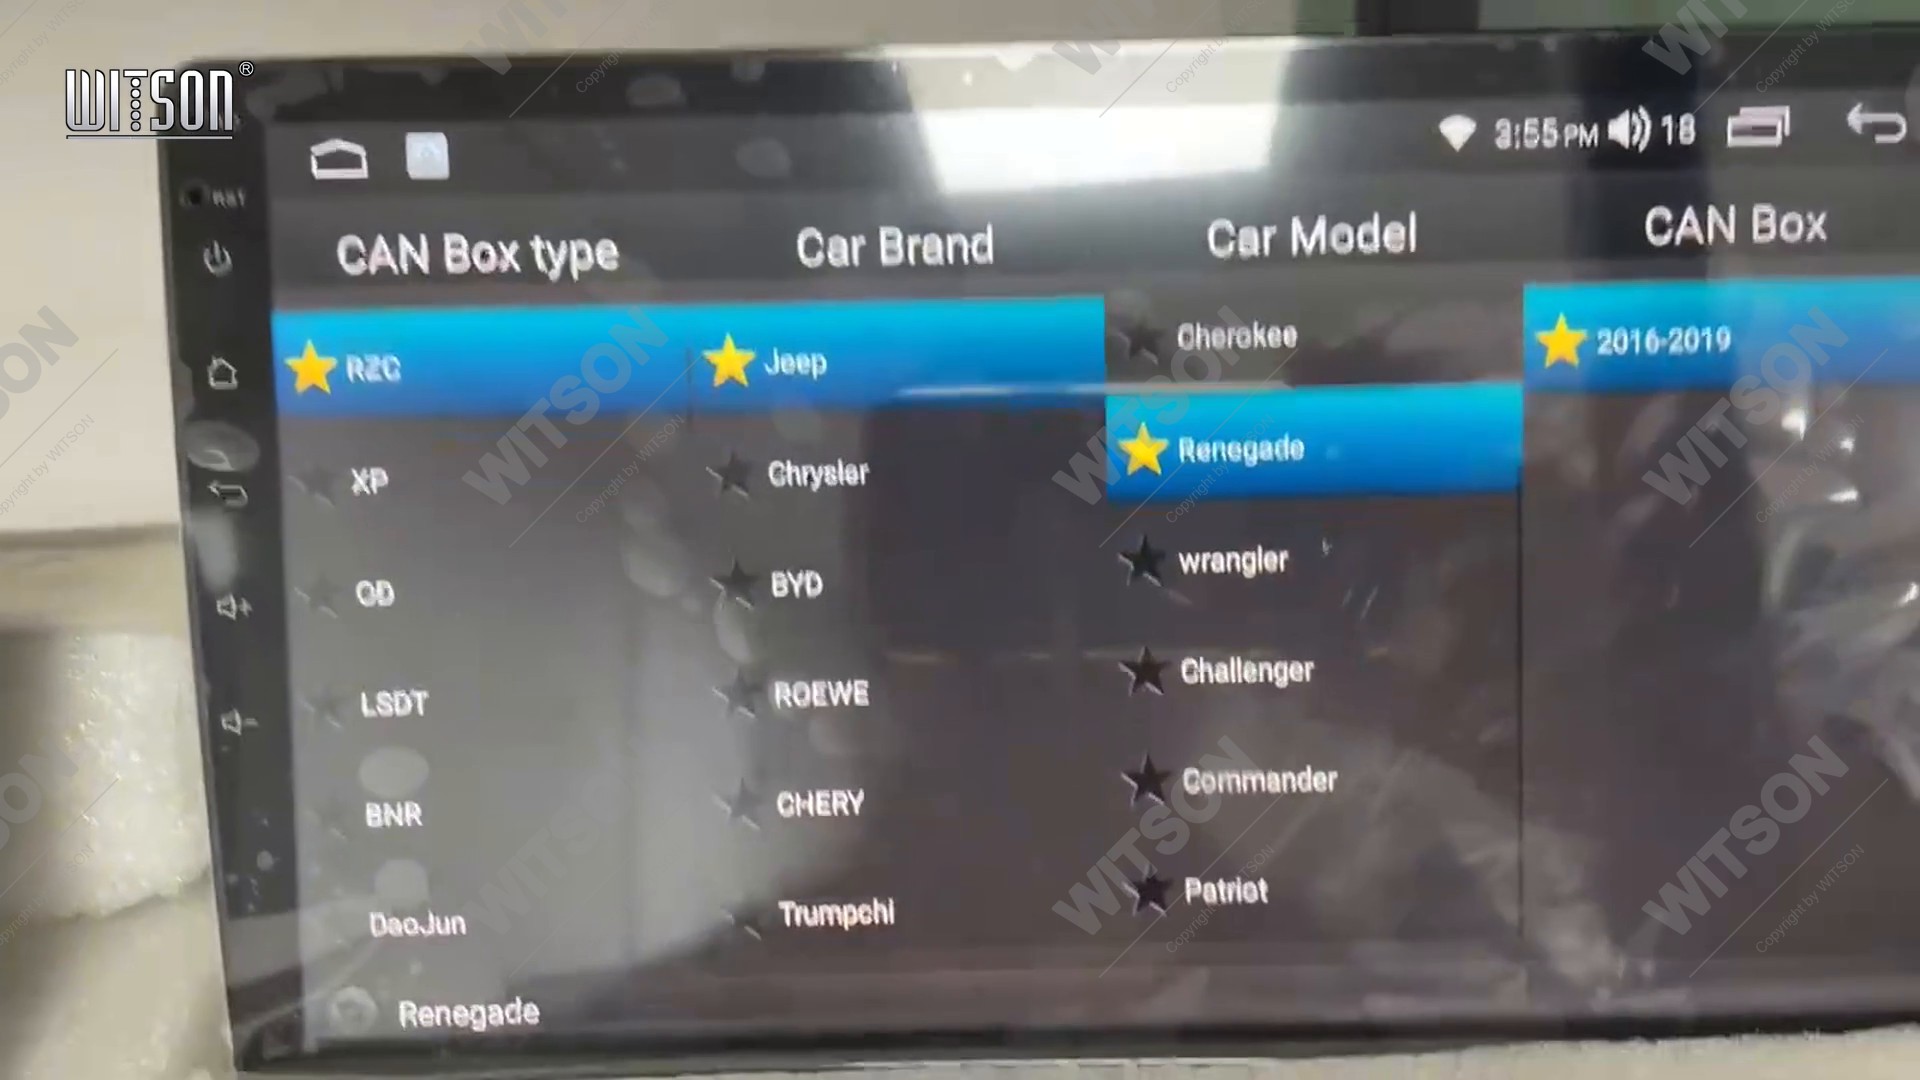
Change one column at a time and watch the columns to its right: they repopulate as soon as a brand or a model is chosen, and a stale entry left in a column that has just been rebuilt is the most common reason a correct-looking setup still does not work. When all four stars are on the right entries, leave the screen - there is no save button, the value is written as you tap.
If the car is a facelift or a model year that falls between two ranges, try the range that contains the build date first, then the neighbouring one. Do not pick a different model to make a symptom go away: the steering keys may start working while the climate display stops, which is harder to diagnose than a plain silence.
The protocol data is installed from the same update screen that carries the other system packages, and it can be refreshed on the car without a laptop or a USB stick - the unit downloads it.
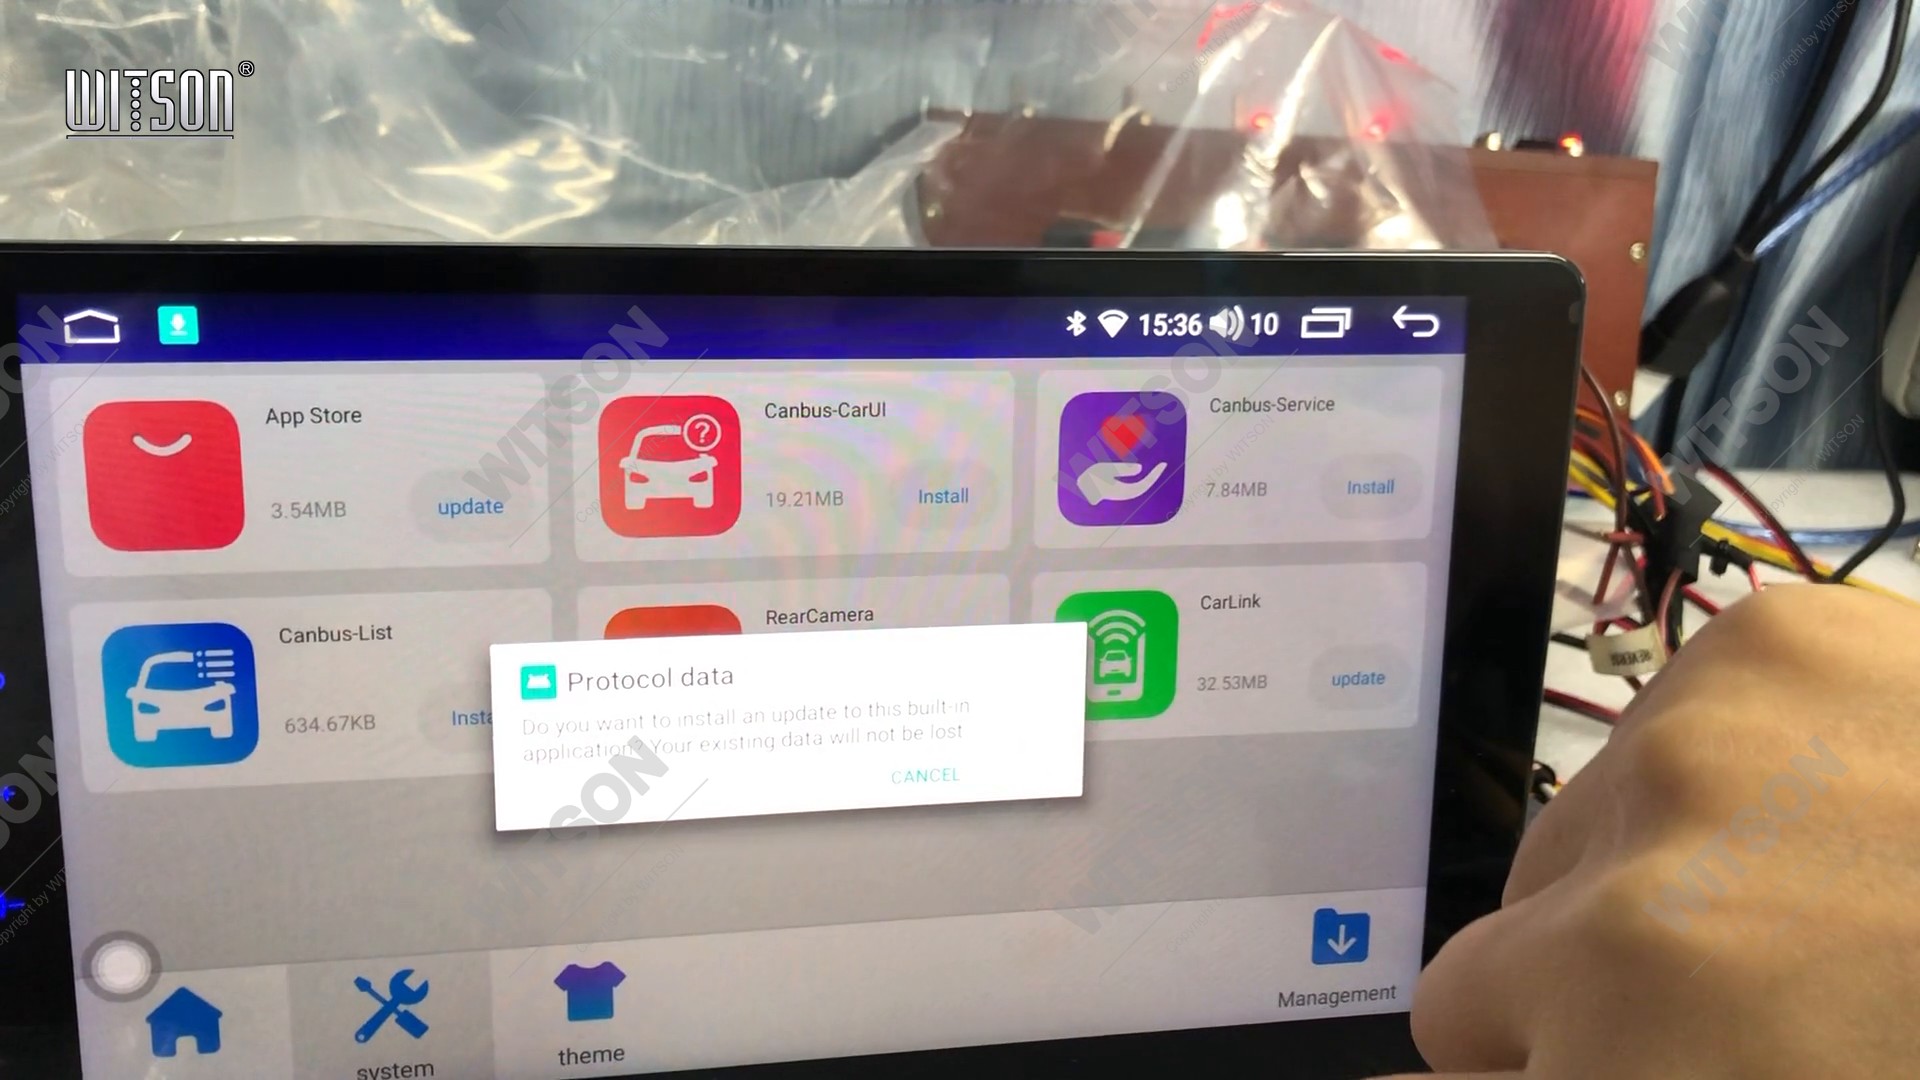
Leave Settings and open the system entry in the app dock. The screen lists the packages the unit can update, each with its size and a button on the right: App Store, Canbus-CarUI, Canbus-Service, Canbus-List, RearCamera and CarLink. The buttons read update, Install or open depending on what the unit already has. The CAN box work is done by the three Canbus entries.
Tapping the protocol update brings up a white dialog titled Protocol data with the line Do you want to install an update to this built-in application? Your existing data will not be lost. and two buttons, CANCEL and INSTALL. Tap INSTALL. The same dialog returns with Installing... and a thin progress bar underneath.
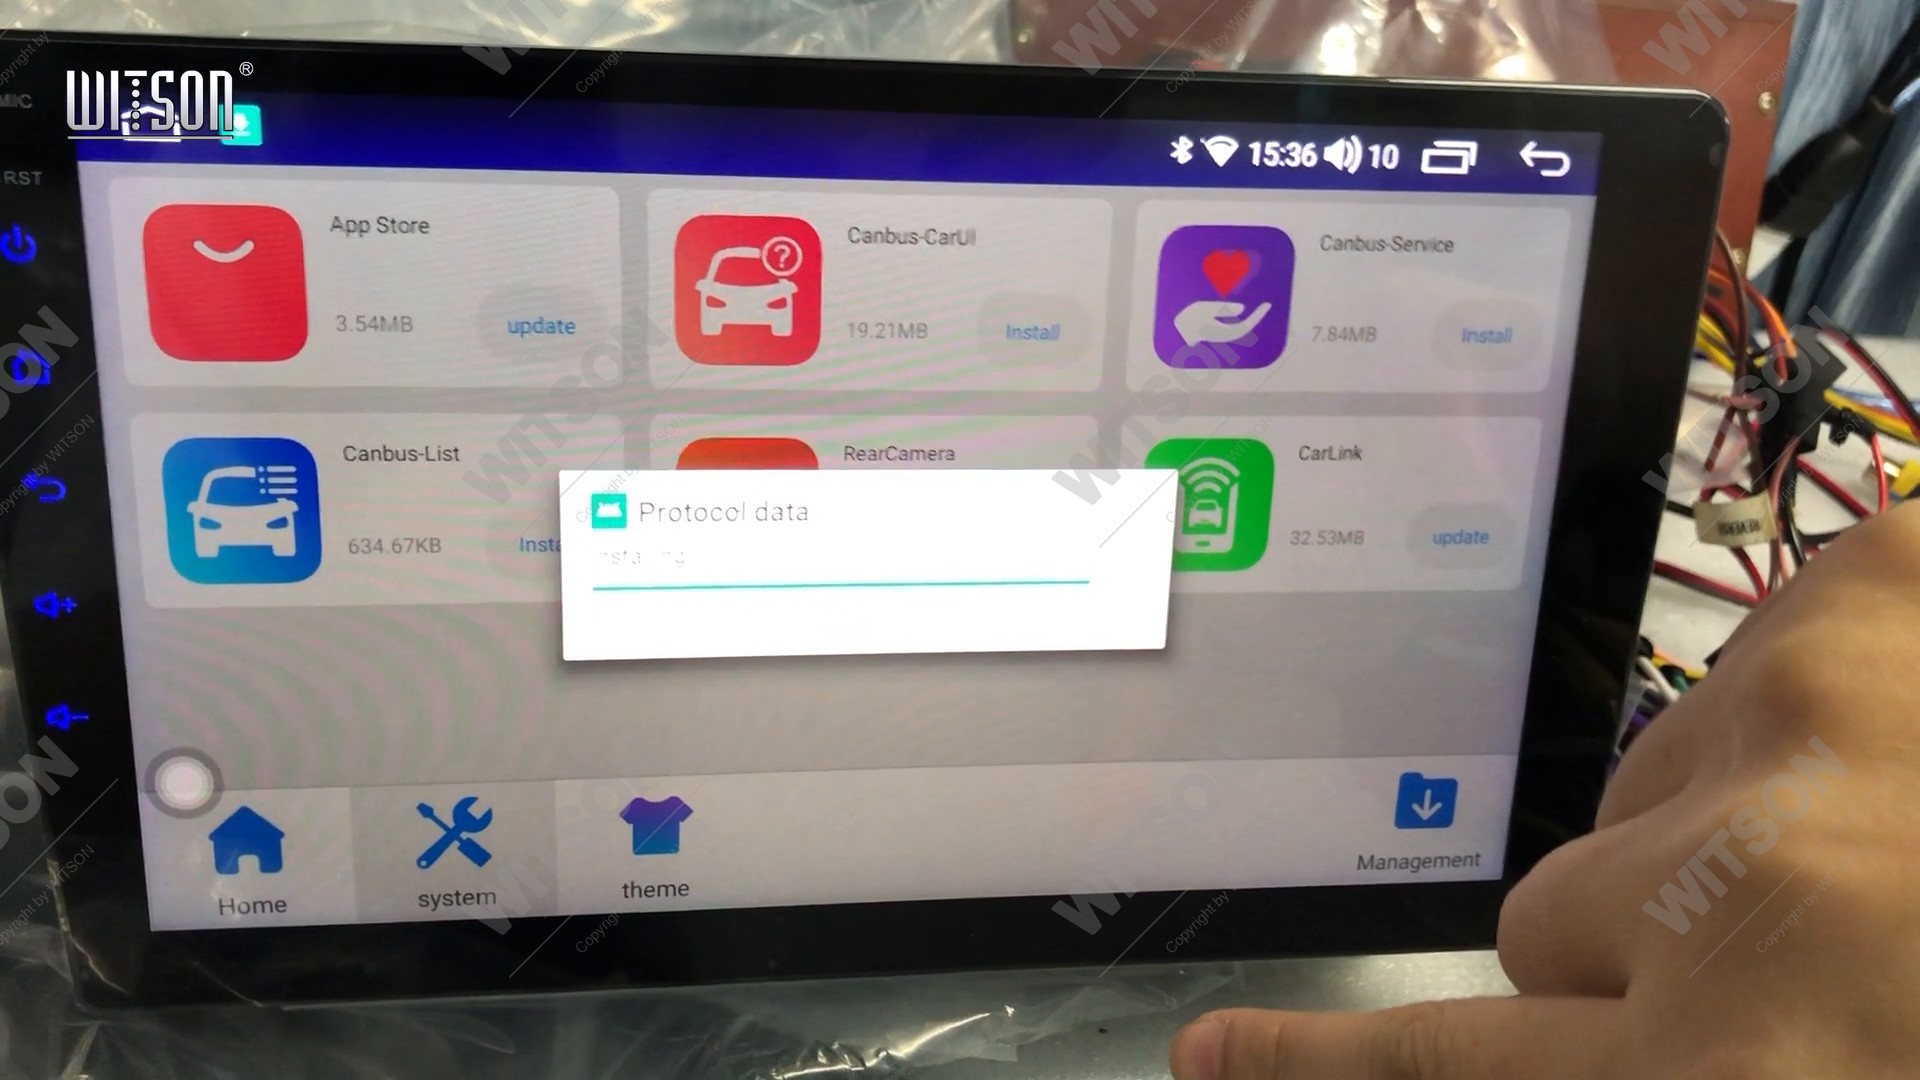
When the bar finishes, the dialog title stays Protocol data and the line under it changes to App installed. Dismiss it and the unit returns to the update list with the buttons showing the new state. Do not switch the ignition off during the install: the package is written to the unit's storage, and cutting power part way through leaves the protocol data incomplete.
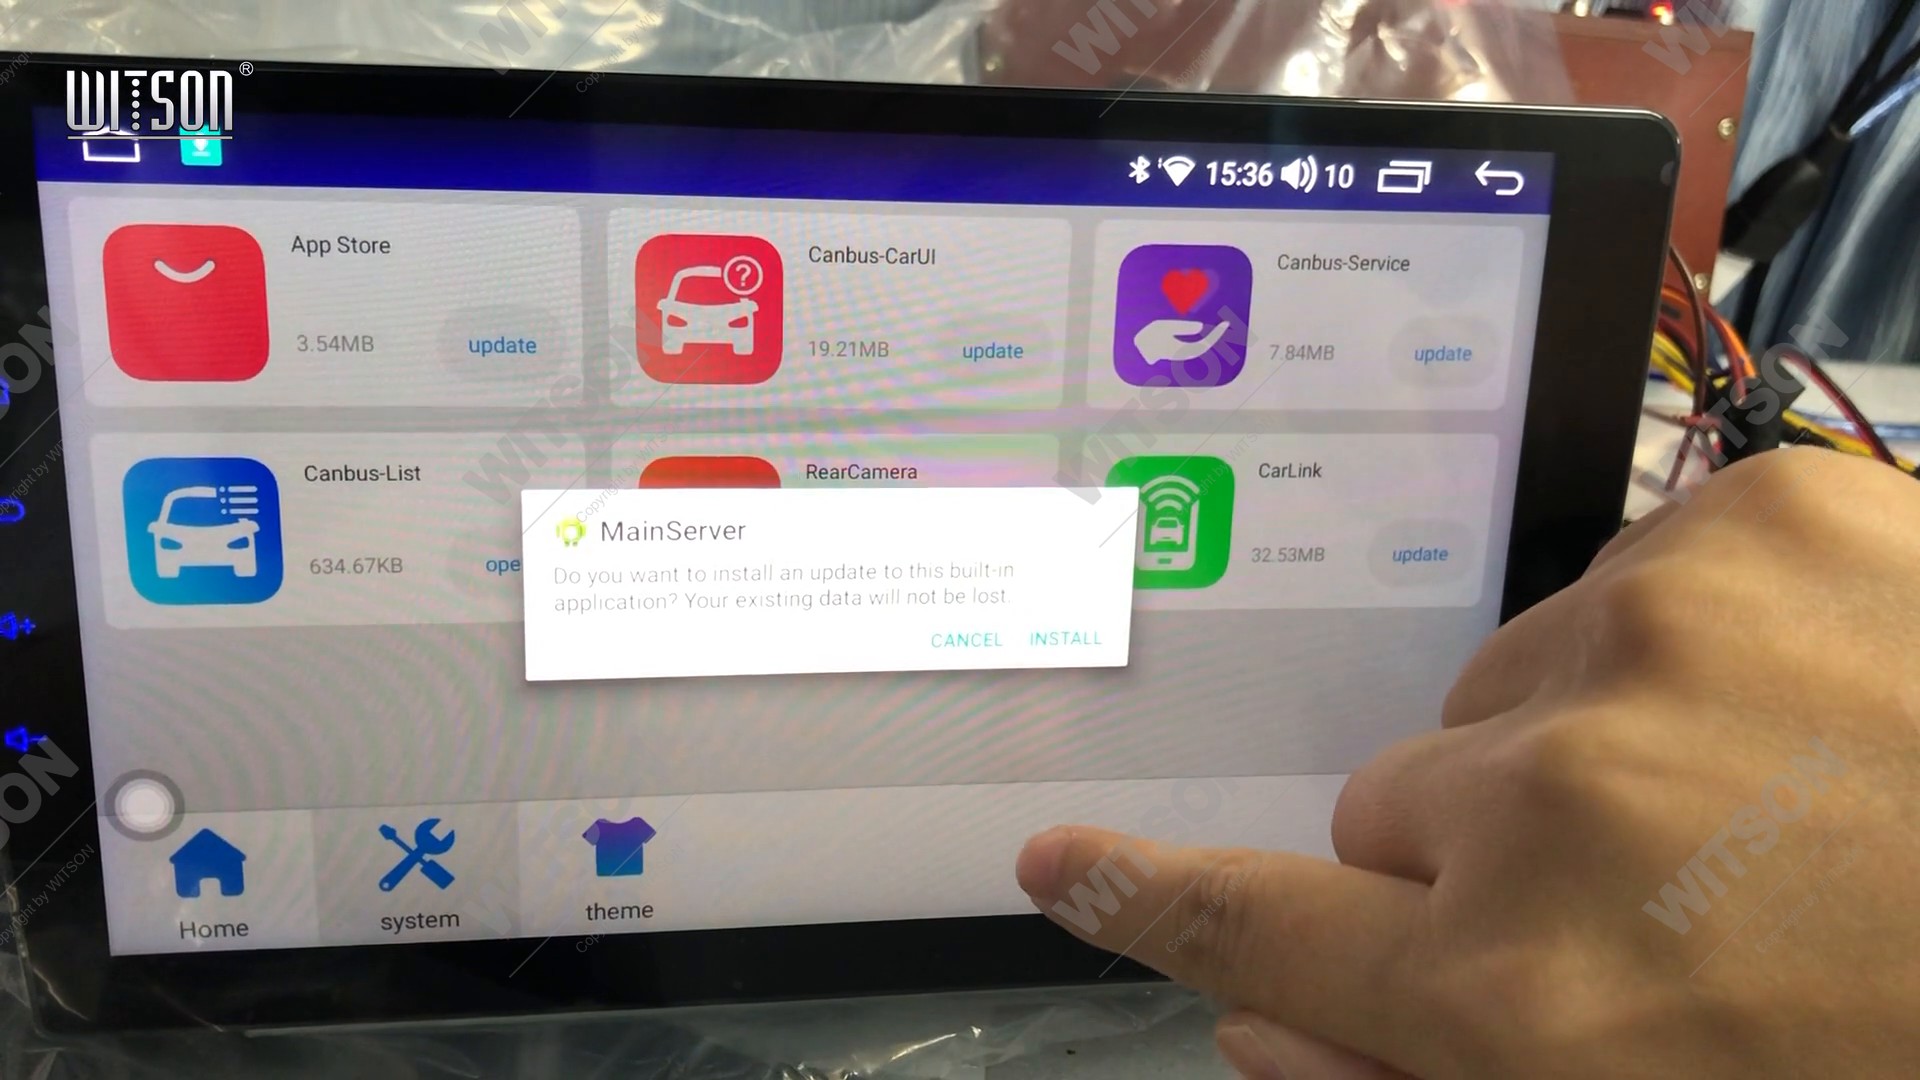
After the update, go back into the Factory menu and read Car Model once more. It should still name the car you selected; if it has fallen back to a default, select the four columns again. Then check the functions that come from the car - steering keys, illumination, reverse - with the engine running, not on the bench.
If the four columns are right, the protocol data is current and the car functions are still dead, the menus are no longer the suspect. Work outwards from the unit.
The box has no power. The CAN box takes its supply from the harness, and a connector pushed in but not latched behaves exactly like a box that is not there. The harness label that carries the amplifier control wire is a useful landmark - the box connector sits in the same bundle.
The box is powered but the bus is not. The CAN pair is a twisted pair with a fixed polarity in the connector; swapped, the box lights up and stays silent. This is worth checking before any menu is touched a second time.
The box is the wrong family for the car. A box that was supplied for one manufacturer can be made to fit the connector, and the four columns will happily accept a selection for it - but the messages on the bus will never match. The box type column must match the hardware, not the car.
The unit was moved from another car. A second-hand unit keeps the previous owner's protocol settings and its protocol data. Reset the four columns, then install the protocol data again, in that order.
Everything in the car works except one thing. A single dead function - steering keys only, or climate only - usually points at that function's own setting rather than at the box. The neighbouring guides cover the frequent ones: learning the steering wheel controls, reversed volume and track keys and the reverse camera mirror and format settings. If the unit also has no sound at all, start with the AMP switch and audio output guide before blaming the box.
The platform behind these menus, including the connector layout, is described in the HB / DHB and HV / DHV platform introduction; the default wording of the pages is in the WITSON operation manual download section, and more clips like this one are collected under the Video Showcase.
| What you notice | Cause | What to do |
|---|---|---|
| Unit works, but no car information at all | CAN box type set to another vendor family | Factory, Original Car Agreement, set CAN Box type to the code on the box. |
| Steering keys dead, everything else fine | Right box, wrong car model selected | Re-pick brand and model, then re-run the steering wheel learning. |
| Climate or radar missing on one model year | Year range does not cover the build date | Try the neighbouring year range in the CAN Box column. |
| Car functions drop out after a while | Protocol data older than the car | Open system, install Protocol data, wait for App installed. |
| Nothing at all, box cold to the touch | Box connector not latched, or no supply on the harness | Reseat the box connector; check the supply pin on the harness. |
| Box powered, still silent | CAN pair polarity reversed at the connector | Check the two bus wires against the platform wiring diagram. |
| Worked before the unit was swapped | Previous car's protocol settings and data still loaded | Reset the four columns, then reinstall the protocol data. |
Behind the Factory code. Open Settings, tap Factory, then Original Car Agreement. The screen it opens has four columns - CAN Box type, Car Brand, Car Model and CAN Box for the year range. They are not on the Device page with the sound and display rows.
From the box itself, not from the car. The codes in the first column - RZC, XP, OD, LSDT, BNR, DaoJun on the unit in our clip - are vendor families, and the one that applies is printed on the box supplied with the harness. If the box has no marking, ask the supplier with a photo of the label.
Not always, but it is the cheap step that removes a whole class of doubt. The columns choose which set of message definitions is used; the protocol data is the package itself. If the car is recent, or the unit came out of another vehicle, install it - it takes a couple of minutes and keeps the existing data.
It updates the protocol data on the head unit - the dialog says so plainly when it reports App installed, and the package appears in the same list as Canbus-CarUI and Canbus-Service. Box firmware that has to be flashed through a serial adapter is a separate procedure and is not part of this screen.
They survive a normal reboot and a battery disconnect. A factory reset returns the block to defaults, which is why a unit that worked for months can come back with no car functions after a reset - re-check the four columns and the protocol data before assuming the box has failed.
Reference
Still no car information after setting the four columns? Send us the car model, the year, and the code printed on the CAN box.
Ask WITSON SupportMore in the WITSON how-to guides, including the DHV no sound and AMP switch guide.