360 camera - parking guide lines
Twenty minutes hunting through a menu, a colour picker that responds, and your lines still land a hand's width inside the tyres. On a 360 camera the colour is easy and the width is geometry, and once you know which box draws them, both turn into a five minute job.
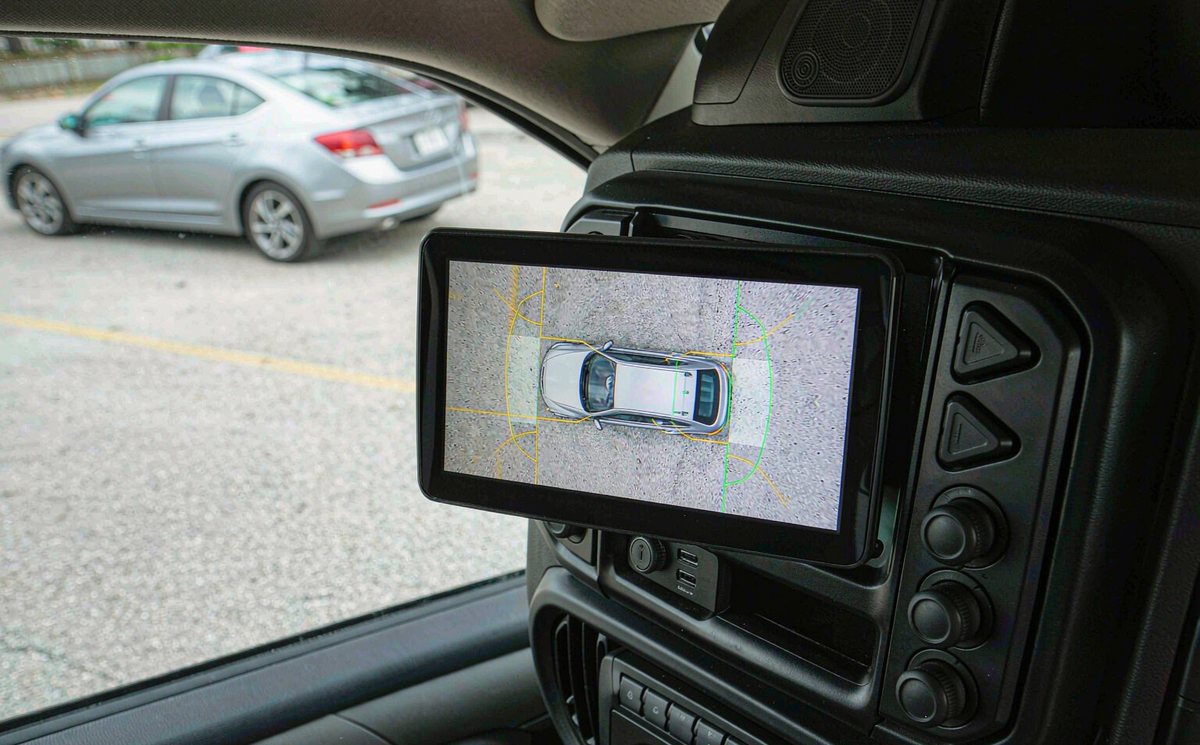
I've found this one arrives every autumn, when flat light makes drivers notice that the lines on their bird's-eye view don't line up with the bay. Most go straight for your settings menu and change the colour, which is the one adjustment that doesn't move a line by a millimetre. It's an awkward half hour, and it's avoidable.
A 360 kit's just four wide-angle cameras and one processor. The cameras sit in the grille, under both mirror housings and on the tailgate, and the processor stretches each fisheye frame flat, finds the overlap between neighbours and stitches the four into the top-down picture you see. Your guide lines are painted into that picture before it leaves the box, so by the time your screen gets it, the geometry is baked in.
Your head unit takes a finished composite signal and shows it. It isn't drawing anything unless its own reverse guide line feature is on, which is the default on most retrofit units.
That's where double lines come from: two layers, two sets of geometry, and neither knows the other exists.
Drawn by the camera processor in the same step that stitches the four feeds. They follow the vehicle width value set when the box was configured, and they move with the steering only if the box is reading a steering angle.
Drawn by the radio over whatever picture arrives on its camera input. Fixed, tied to the radio's own idea of a car, usually a single colour, and switched on by default. With both on, you get two pairs at slightly different widths.
A unit with android head unit with reverse camera input takes that composite signal and nothing else travels with it. Nothing in the signal tells the radio whether the picture comes from one camera or from a box stitching four, so it can't switch its own overlay off for you.
None cost money, and each takes less time than finding your installer menu. Work through them in order; check one decides whether the rest matter.
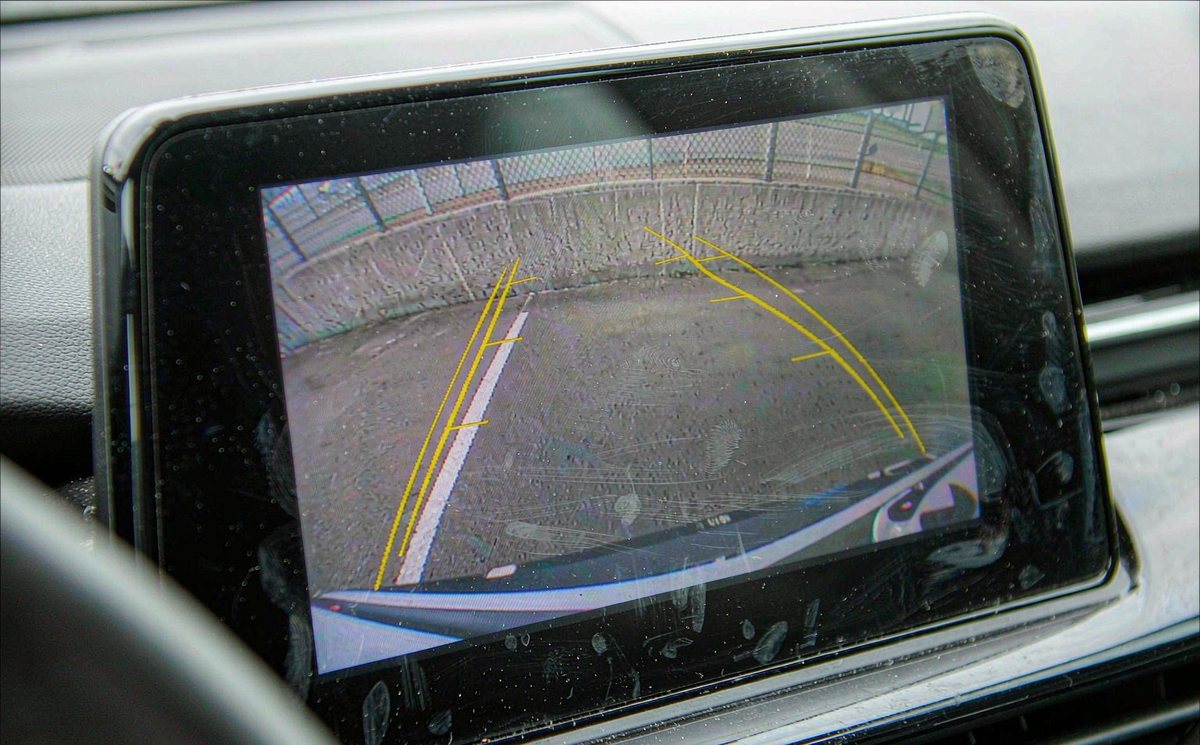
It's not about accuracy. Colour is a display preference; changing it moves no line and corrects no distance. What it does change is whether you can see the line at all, which matters more than most drivers expect.
It's all about contrast against the surface. A yellow line on pale concrete in flat light is weak, white lines vanish in a bright bay with white markings on the floor, and on wet asphalt at night, when the camera lifts its gain, thin light lines wash out first.
Some systems use colour for distance bands. Which colour sits at which distance is decided by whoever wrote the firmware, so treat any assumption as unconfirmed: park with a marker on the ground, roll back until the colour changes, and measure.
Which colour should you pick? The one you can see on the surfaces you park on, in the light you park in. That's a two minute test, less silly than copying a screenshot from a forum.
This part gets set by feel, and it's the part that costs a wheel. The overlay is drawn in the box's own coordinate system using a vehicle width value from the model you selected, so if that value's wrong, the lines are wrong by the same proportion and still look normal.
Measure once at the rear: the distance across your two rear tyres, outer sidewall to outer sidewall. A compact hatchback often lands near 1,750 mm, a larger saloon nearer 1,900 mm. Write it down before you open any menu.
One bar is the width you measured across your rear tyres; your line span should match it.
Think in pixels for a moment. If the bird's-eye image covers about four metres across in 800 pixels, one pixel is five millimetres, so a 1,750 mm track is around 350 pixels wide. Widen the overlay by 40 pixels because the car looked narrow, and you've added 200 mm of clearance on each side that isn't there.
Going wider than the car isn't free: the line promises space your bodywork doesn't have, which is how bumpers end up scuffed on pillars.
Guide lines are an aid; maker manuals say the picture can differ from reality. Use your mirrors for the last half metre, whatever the overlay says.
It's not in the Android settings menu. The line colour and width live inside the camera application that came with the 360 kit, and many kits keep a second, deeper page for installers, reached by a long press or a short code rather than a normal tab. Menu names differ, so there's no single path to quote.
Here's what each entry tends to control. A vehicle model list sets the width and wheelbase the box assumes. Profiles are usually grouped by market, because a European-built car and its North American twin can carry different camera part numbers. A colour entry changes the overlay only. A dynamic or static switch decides whether the lines take a steering angle at all.
That one's got a hardware condition behind it. Dynamic lines need a steering angle, and on a retrofit it usually arrives through an android head unit CAN bus decoder box rather than a dedicated wire. No decoder, or one set to the wrong vehicle profile, and the lines stay static whatever the menu promises.
Wiring matters too. Most kits take the reverse trigger from the same wire that switches the radio to its camera input, which is why an android head unit reverse camera wiring diagram is worth having in front of you before you blame the software. If the trigger reaches the radio but not the box, the box may never wake into reverse mode, and you'll be adjusting lines nobody is drawing.
If the colour is set, the width matches your measurement, and the lines still sit crooked or drift between the four views, stop adjusting and start checking the cameras. Overlay geometry sits on top of calibration, and calibration is the part that quietly goes missing.
Calibration uses printed mats laid at measured offsets around the car on a level floor. The system reads known points on those mats through each camera and works out where each one sits. It's redone when a camera is removed or replaced, when a mirror housing, bumper or grille is disturbed, after suspension work, a tyre size change, or a module reset and recode.
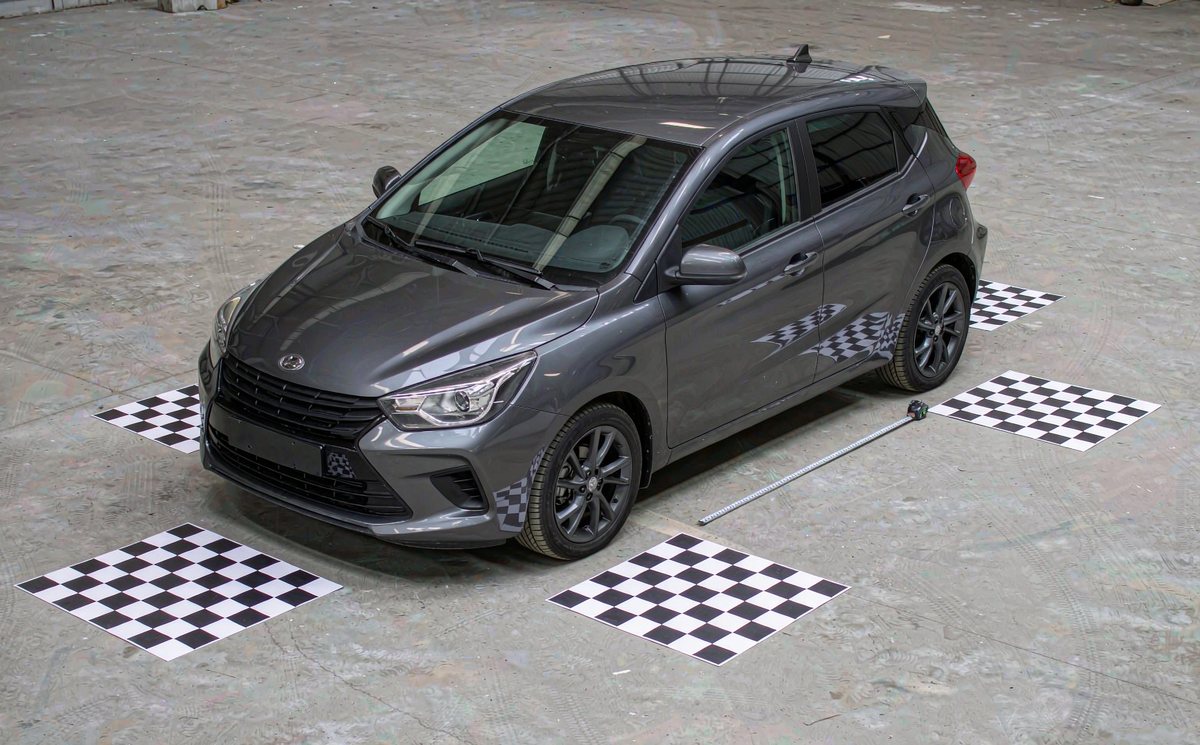
A camera that's shifted a few millimetres is enough. The stitch develops a seam and the lines lean. It's maddening, but the fix is geometry, not a menu: your settings edit the drawing, never the calibration underneath it.
One more condition before you spend anything. If your car is right-hand drive, the mirror cameras sit on the other side, and a kit set to a left-hand-drive profile can mirror the top view or put the near-side line on the wrong side. A mirrored picture rather than mirrored lines is a separate fault; a reverse camera image flipped horizontally covers it. Confirm whether your car is LHD or RHD, then confirm the profile matches. I'd rather ask twice than guess from a listing photo.
Free checks first: count the pairs, steer the wheel, look at the seams, measure on the ground. Then the wiring: reverse trigger to both devices, video cable seated, ground at the box clean. Then the parameters: vehicle profile, measured width, calibration if the seams are off. Only after all three would I look at hardware, and even then a single camera is the usual suspect rather than the whole kit.
That order saves money because three of the four steps are free, and saves time because cheap checks eliminate expensive answers. Buying a camera when the real fault is a reverse trigger that never reaches the box is the commonest waste I see.
If you're still choosing the radio, the WITSON universal one and two DIN range lists which units carry a camera input. If the settings are right and the seams still won't hold, the limit is inside the box: its calibration memory, its stitching, or the radio's camera input. That's a hardware conversation, less tedious than buying parts by guesswork.
Menu names differ from kit to kit, so the operation manual is usually the shortest route to the line settings for your own build.
Usually yes, inside the camera application that came with the kit rather than in the Android settings. Pick the colour you can see against the floor you park on; it changes nothing about distance.
Because two devices are drawing. The 360 box paints lines into the picture and the radio paints its own over the top. Switch the radio's reverse guideline option off and one set goes away.
Possible, and usually unwise. A wider overlay promises clearance you don't have, so the first tight pillar teaches you what the setting cost.
If the seams between views are stepped, yes, or a workshop with the right mat set for your car. A menu can't correct geometry the cameras no longer agree on.